Wednesday, August 13, 2014

Happy Mail, an awesome sale and Work-in-Progress Wednesday

Hi peeps!


As you all know, I am a Craftsy Affiliate. I wanted to show you some of the great things they have on sale at the moment. 

This class has been on my wish list for a little while and is on sale for only $19.99(C$)! But not for long…sales change quickly on Craftsy.

FYI: all prices listed here are in Canadian Dollars. Prices will be even cheaper in the USA!


The Barcodes quilt kit is on Clearance for only $33.29 and comes in two colour ways. I bought the Boysenberry kit, as you can see below. 


This one is the Twisted Irish Chain-Granny Squares Kit, for only $41.62, which is  a great deal considering you get 15 fat quarters of designer fabric, Kona cotton in grey for the 'chain' pieces and a half yard for your binding.


Here is my happy mail!!! As you can see, the Barcodes kit in Boysenberry is rich and dark. A super-easy pattern, you could get it done in a day or less!

The Twisted Irish chain kit has some very modern colours that are a bit out of the box for me, but I am game to get it together. The pattern, by the wonderful Amy Smart, is sent to your patterns library in Craftsy, so that you can access/print it as many times as you like!


I got some pre-cut yardage of Kona cotton in Rich Red, White and Black. They are on sale for up to 35% off! They come nicely packaged in reusable zip bags.


Here are the pre-cuts I scored, at super prices! The Kona-white charm packs are $7.28 right now! Riley Blake small chevrons charm packs are only $5.20. I am keeping them to add a little bit of chevron to my scrappy hexie projects. 

The Bali Batiks are all sold out(see, things go very fast here), and the Riley Blake small dots and 1/4" gingham mini layer cakes are $10.20 and $6.84 respectively. I wanted to have a little bit of polka dots and gingham prints to add to various projects. I just love Riley Blake fabrics!


They have the super-popular Olfa Splash rotary cutter on for 20% off, now only $14.96.

Remember, it is fast, easy and FREE to join Craftsy. There are lots of FREE classes and independent patterns to try as well as a large Clearance section and 19 quilting classes on sale(at the moment).

Here's the link to join or sign in: Craftsy 

Website owners and bloggers: Join Craftsy’s Affiliate Program Today


So I got going on the Giant Hexie Flower Quilt I told you about last post. I thought I would save time and use fabric glue when I fold over the seam allowances, instead of having to baste all those seams to the thick poster board. I wanted to save my hands…and my needles!

I was going pretty good on the first seam, but when I had sewed the second petal on and had to switch direction to sew that petal to the centre(white) hexie, the glued seam allowance of the white hexie started to pop off. Grrr..

I managed, with the help of my handy Clover Clips. I used them to keep the seam allowances folded over and attached to the poster board. 

There were a few minor curses though.


This is the fabric glue I used, I am sure you can find it at most large fabric/craft stores. I would go ahead and use the fabric glue to hold the seam allowances to the Giant Hexie petals, but for the centre piece I would definately baste them down.

It only took me an evening of watching Luther on Netflix to get the entire Giant Hexie Flower done. Now, I am going to go a step further and hand appliqué the hexie flower to a 60", or similar, square of fabric. 

I am not sure I have enough of that orange mini bias stripe I showed you last post. We will see how it goes. I have three more of these cut out and ready to go, once I have appliquéd and removed the poster papers from the first one. If the appliqué doesn't work out, I will have 4 baby/lap quilts to give away or sell.

I want to thank you so much for supporting my sponsors! With my small commissions, I can purchase items/supplies for my self-sponsored giveaways. And we all want more of those, don't we!!! hee hee hee

Thanks for reading and have a great day!


Jacqueline


Sunday, August 10, 2014

Sponsor Sunday and Really Ginormous Hexagons!

Hi Peeps!

Disclaimer: this post contains affiliate links.


Sale ENDS on August 11, 2014 at 11:59 PM MT time
Just a little reminder that the Craftsy classes sale ends tomorrow! Get em while it's good! 

I picked up Playful Piecing Techniques by Camille Roskelly for only $14.99, and will watch it once the weather turns cooler. I love, love that you own your purchased classes forever! 

There are also some great deals to be had in their Clearance section!
Here's the link: Craftsy

Don't forget, if you own a website or blog, you can join the Craftsy Affiliate Program and earn a little cash!


Fat Quarter Shop is offering 20% off all their Riley Blake prints, but only until Midnight August 14, 2014. I can see some chevrons and dots in my future!

You can click through to Fat Quarter Shop with my button, top left.


Paper Pieces has their Fan Quilt kit on for a huge 30% off. This includes the die-cut paper pieces you will need and the pattern for making the quilt. Use your own fabric to create a one-of-a-kind treasure. 

Don't forget, you can combine you savings and use my "qsh20" code to get 20% off the rest of your purchases!


Riley Blake Designs have launched their latest fabric line: Hope Chest, a salute to the always-sweet 1930's reproduction prints. Available in yardage and pre-cuts and in stores now.


There's only 6 hours left to take advantage of Massdrop's Aurifil thread box in useful neutral colours. Twelve large spools, there are two collections to choose from. They ship FREE in the USA and only $8.28 to Canada.


Use the below link to join this awesome deal!!!


Massdrop is also offering two different bag-making kits from Sew Sweetness; the Aragon bag and the hugely popular Airplane bag. Both kits come with all the supplies(just add your own thread) needed to make a bag(or two) of your choice. At only $39.99, I am getting both! They will make awesome Christmas presents. Only 3 days left to get in on this drop, they ship Free in the USA and $8.28 to Canada.


Use the below link to join this awesome deal!!!


This is one of the latest projects on my growing to-do list. Haley, of The Zen of Making, is a quirky gal and I really enjoy her blog. This Giant Hexie Flower Lap Quilt she designed is one of literally hundreds of tutorials she has posted. 

Here's the link: Giant Hexie Flower Lap Quilt

Head on over and share some hexie love!!!


I picked up some poster board from the 'good' dollar store and made my template, as per instructed. Then, using my rotary cutter, and an old blade, I cut out the 7 hexies needed for the centre and the petals. The giant hexies measure 15.5", point to point.


I cut out my fabrics using yardage(adding a half-inch seam allowance around all edges to fold over the poster board), but you can use seven different/co-ordinating fat quarters. I cut out 4 of each colour, as I plan to make four of these giant hexie flowers. The difference with mine is that I am going to appliqué each giant hexie flower onto a background and make a queen-sized quilt. Go big or go home, I say!!! 

Wish me luck…please!...as I have never attempted such a large hand-applique project. Eek! My Clover Clips and stick of fabric glue will come in very handy.


This is my background fabric. It is an orange and white diagonal stripe.

I hope you will enjoy the above offers. I am able to offer demos, tutorials and giveaways only because of my sponsors and it would be great if you could support them. Thanks!

Thanks for reading and have a great day!


Jacqueline


Thursday, August 7, 2014

Thrifty Thursday: Craftsy sale & Value Village finds!

Hi peeps!

Note: This post contains an affiliate link

I would like to introduce Craftsy to you. They are an online source of great how-to classes, kits and supplies for a huge assortment of crafters/sewers and quilters! I have been enjoying shopping there for a couple of years now. I have purchased several courses(you own them forever!), kits, fabric(including pre-cuts) and supplies. There's an order coming my way as we speak!!!They also take Paypal for payment which is a huge selling point for me! You can check out their fun and informative blog.

I have been accepted into the Craftsy Affiliate Program, which means I can show you upcoming sales and share special coupon codes. Awesome!!! Note: in return, I receive a small honorarium for each purchase, meaning I can offer more self-sponsored giveaways!!! Every purchase makes a difference. Thanks!

Please use this link to join or log in to Craftsy: Craftsy

It is completely free to join Craftsy and they do have some super free classes available to get you started!

For those of you who have a website or blog, it is very easy to become an affiliate. Follow the link below to get started. Again, it is completely free to sign up.

Sale ends August 11, 2014
Check out this super sale on all of their classes. If that is not a Thrifty Thursday special, I don't know what is! ha ha ha

Sign up now to have fun classes to enjoy in the Fall/Winter:


On sale for only $14.00, regularly $30.00
I am a big fan of Camille Roskelly(the creator of the popular Swoon quilt block) and already own one of her Craftsy classes: Pre-cut Piecing. I have the above class in my Craftsy cart and will be purchasing it right away.


I thought you would like to see how I am coming along with the Kid's hexie quilt. I call these 'triplets' and I have about 350-ish sewn up. The long king-sized quilt requires over 900 of these. When I am done sewing together the triplets, I will sew three of them in a row, which I call 'niners'. Then I stack two niners together to give me a 18-piece 'block'. 

I will have over 200 of these 'blocks' when I am ready to lay them out on the floor and start sewing them into rows. I sew my hexies every evening, except when a bad migraine or my fibromyalgia forces me into bed. …yeah, I know...


And now for my trip to Value Village! I got my trusty shopping cart ready and hit the street. We had free transit this past Monday, due to two major transit disruptions in July. So I thought I would head out of my cave and see the world! 
Thrifty Thursday savings: $5.50.

I found a matching rectangular tub with a blue lid, but they had it marked at $3! I have seen these in dollar stores, so I told a supervisor. She agreed with me and priced it as 99 cents. Since I had a 30 % off coupon for my entire purchase, it came to just 69 cents! Extra bonus savings!!!


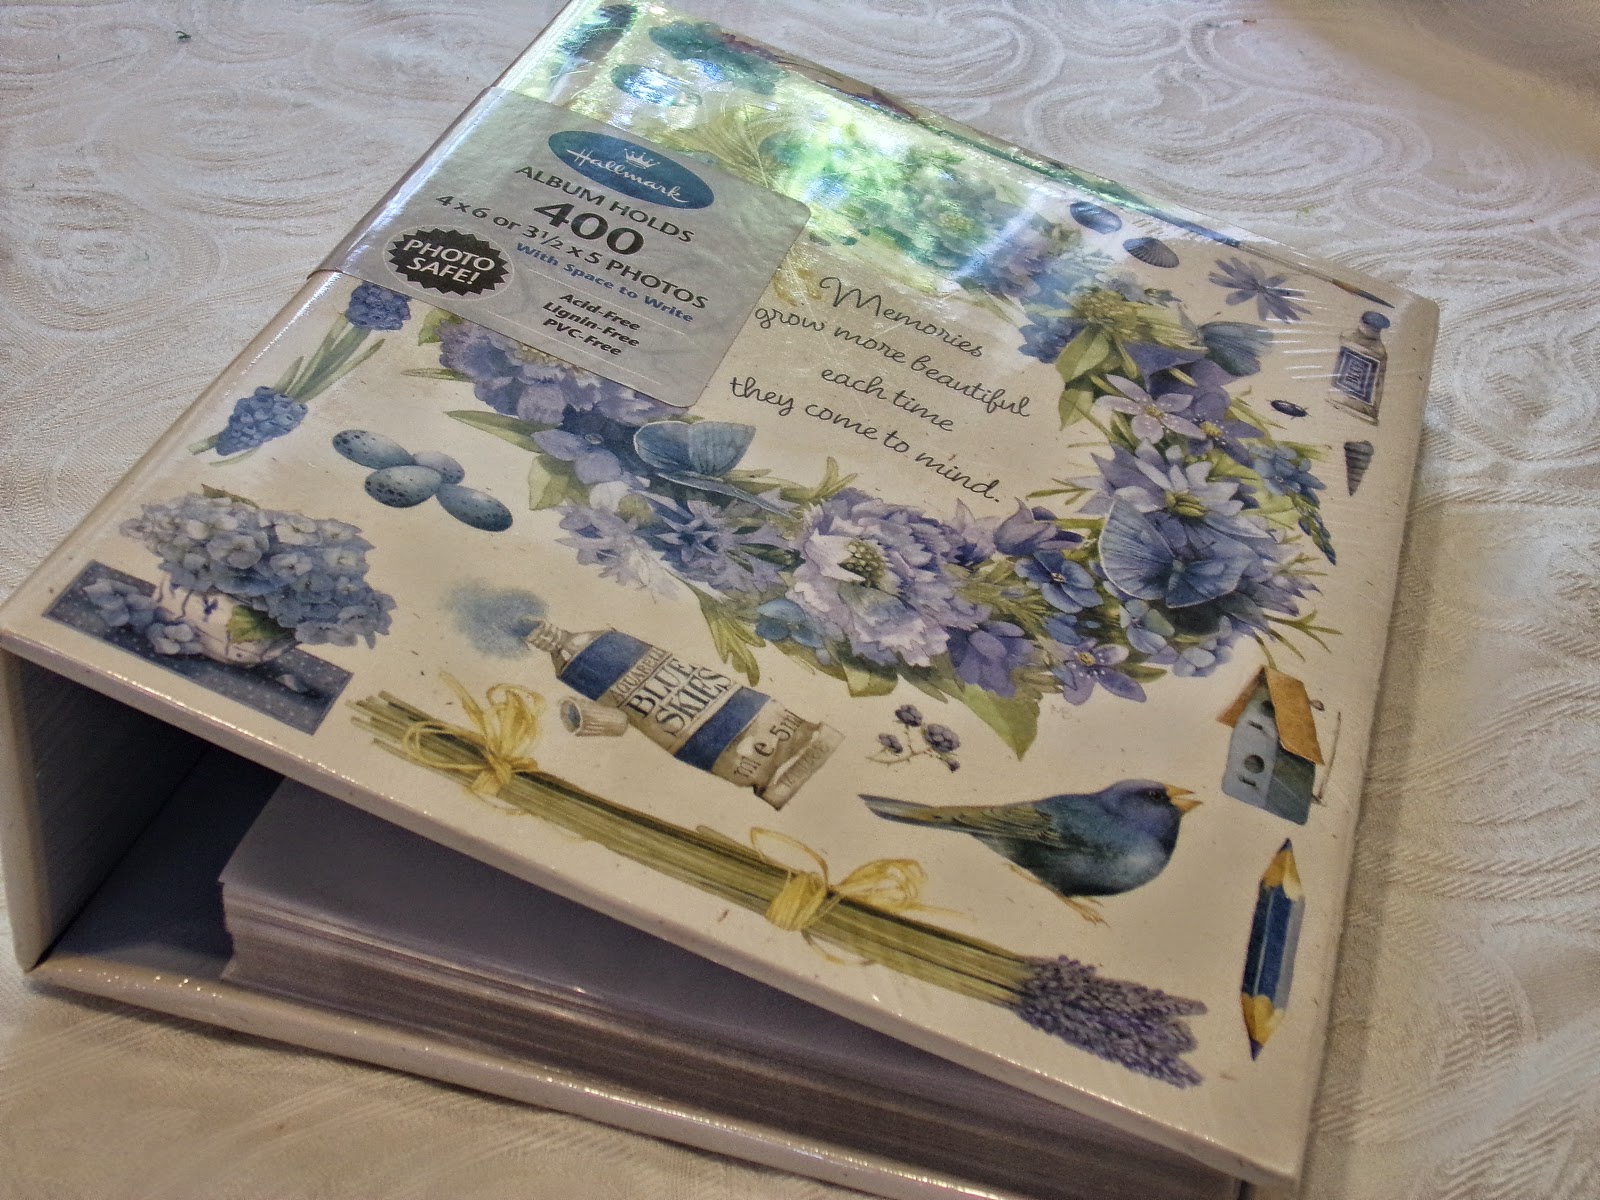
This photo album is brand new and the artwork on the cover is by my favourite watercolorist, Marjolein Bastin. Her stuff is sooo sweet! I have some of her stationary as well. 

I have been wanting to put our Las Vegas wedding photos in an album for over 14.5 years! Time I get that done.


Picked up some new, packaged unused stationary items. The white and pink cards are handmade and the package contains about fifty of them. They look like they might have been wedding thank you cards. They will suit my purpose- I plan to open an Etsy store sometime in the future and these would make great thank you cards…stay tuned!


Here's a collection of craft supplies I picked up on the cheap. The roll of cording is huge! If anyone wants a couple yards of off-white polyester cording, please message me. I would be happy to send some along-just cover the shipping cost(less than $4.00). I love the colourful, nubby yarn at the top.


I have been wanting one of these for years, but there were too expensive…up to $20 in some places online. This one was priced at $4, but there is a sale price ticket right on the package(above right), that is marked 25 cents. I pointed this out and she re-priced it as 5 cents, bonus! Now the Hubs gets to put it together.


I couldn't pass up this little cushion. I plan to stick it in a mesh lingerie bag, wash it on gentle, air dry, then take it apart. It might become a pocket for a bag or a pincushion of some sort.


Big deal of the day! I got these four bags of zippers for around $10. I haven't even counted how many zips there are! There are 2 colours of light blue zippers in the big bag, they are 20" long and would be great for zipper pouches or bags. I don't think I would use them on clothing, they might not be sturdy enough. There are some heavy-duty and metal zippers in the small packages as well.

If anyone would like a few light blue zippers, just let me know-just please pay the shipping(under $4.00). I am happy to share!


I always look in the tablecloth section,and was not disappointed this time. These two tablecloths were around three bucks each. They will be used for quilt backs or bindings. 

I also got that big bag of off-white fabric pieces for under $5. Most of it is poly-cotton, which will be good enough for bag and pillow interlinings. There are also two nice pieces of quality muslin.


This was a mixed-fabric bag, priced at $4. The turquoise at the left is stretch velour, the turquoise dots are flannel and the brown is home dec, but the rest is nice cotton. A great addition to my scrappy stash.


I found this length of cat panels, too. There are four cats to a panel, and three panels total. I plan to use it as part of a quilt back, mixed with the tan check tablecloth above. I will alternate the squares. There might be enough of the border to make the binding. There is a person in my family that loooves cats!


I got these two men's shirts to cut up, for about $10. They are 100% cotton, and nice plaid prints. I always go for the larger men's shirts as they have more fabric and no breast darts like women's shirts.  I save the buttons too. 

Look for a tutorial on cutting up shirts for quilting, sometime soon.


Last, but not least, I found these cute little dishes. I will attach flat magnets to the bottom of the heart dish(read, I will get my Hubs to do it!!!) and make a pin dish for beside my sewing machine. Not sure what I am going to do with the other two little dishes, they are soaking(the super-sticky price tags are impossible to peal off) in the sink right now. I could make pincushions for my future Etsy store. I may even do a tutorial!

Total Thrifty Thursday savings…$5.50 on bus fare, over $50 at Value Village(with the 30% off coupon and me asking for price adjustments), and $15 on the Craftsy course…priceless!

Don't forget to check out all the sales at Craftsy! They have a large Clearance section, with loads of kits/fabrics and pre-cuts with deep discounts.

Click here to get to Craftsy: Craftsy

Bloggers and website owners can join the Affiliate Program here:


You may wonder at the reason why I am always talking about deals, saving money and thriftiness. I am considered(by myself, my doctor and the government) unemployable/disabled and my Hubs earns the only income at my house. I do receive a small government pension, but that is eaten up quickly by household bill and expenses. The Kid is still looking for a Summer job, and will have a few options available in a few weeks, when he turns 16.

Thanks for reading and have a great day!


Jacqueline


Wednesday, August 6, 2014

FREE TUTORIAL: Adding a decorative flange border

Hi peeps!

Today I'd like to share my method for adding a flange border to the outside edges of a quilt. Note: this is just the way I do it, you may have your own method of doing this.

I am using the Layer Cake Lemonade from Fat Quarter Shop quilt top I demo-ed in this post.


Measure the four edges of your quilt and cut enough 1"-wide strips to go all the way around, with a good half yard extra. I cut 6 x WOF x 1" strips and had about a half yard long strip extra at the end.


Piece your strips together on the diagonal, like you would for piecing binding strips together. Trim excess fabric from the joined ends, making sure to leave about a quarter inch seam allowance. Piecing the strips on the diagonal will reduce bulk once you have pressed the long skinny strip in half.


Press your seams open. I leave the little tags poking out so it is easier for my chubby fingers to separate the seam allowance! 

I think I need to make a new ironing board cover...


Press the long strip in half, width-wise. As you can see, the seam allowance faces in two directions, eliminating the bulk in the skinny strip once it is folded.


Fold the long, folded strip in half, lengthwise and push a safety pin through the two ends. Sorry, blurry..one-handed photo!


Lay your quilt on the floor(carpeting works a charm here!). Pin the safety pin into the carpet pile(I actually press the pin into the foam underlay, just don't tell the Hubs!), making sure that the strips line up with the edge of the quilt top.


Gently lay the flange strips down the middle of the quilt top. Make sure to pull the flange strips slightly so that there are no excess bends or loops in the strips.


Trim both pieces at the same time so your quilt sides will be equal.


Do the same thing through the width of the quilt.


Starting down the right side, pin a flange strip end to the top and bottom corners, raw edges to the outer side. The folded edge of the flange strip should be facing the centre of the quilt top.


Fold the quilt top in half, top to bottom and mark the center point with a pin. Do the same with the flange strip. Match both center points and pin together. Next comes my least favourite part…get down on the floor and pin/clip the raw edges of the flange strip to the outside edge of the quilt top. Oh, my knees!!!

You may have to ease the quilt top edge (or the flange strip) in a little to make the end edges meet. I know I did!

Do the same for the left side.


Now comes sewing the flange to the quilt top. I like to set my needle one click to the right, so that I am sewing less than a quarter inch from the edge. 

This is important as when you go to sew the final border on with a true quarter inch seam, your flange seam will not show. I learnt this through trial and error!


Gratuitous sewing shot. I love, love my Clover Clips!!!


Now pin/clip your a flange strip to the top edge, again folding your quilt top and flange strip in half. Pin at each end and match up and pin your centres. Pin and ease in excess fabric, as needed.

Sew, sew sew!!!


Once you are done sewing the four flanges on, it is time to head on over to the cutting board. Trim off any loose fabric threads and the little points where you joined your flange strips together. This is especially important if you have chosen an outer border fabric that is light in colour. Everything will show through.

This only takes 5 minutes, but boy is it ever worth it.


Press your quilt top from the back. This will set your stitches and flatten any bumps/bulges that may have occurred…ahem...


Now, turn your quilt top over to the front and press well. This will give your flange border a crisp knife-edge.


Ta-da!!!

You are done!

I hope you enjoyed my first-ever tutorial. Stay tuned for a tutorial on the Two Brothers border technique!

Please do comment and share with your friends. Feel free to pin to Pinterest.

Thanks for reading and have a great day!

Jacqueline